
Web ![]()
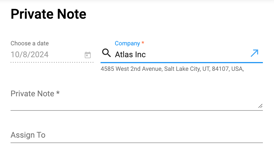
- From anywhere on the Voze web app, click the New button and select Private Note.

- Company and Private Note fields are mandatory.
- Optional: Select a rep to assign to the note to.
-
-
- If you want another user to see a private note, assign them to it. They will receive a notification after you create the note.
- Click the Save button at the bottom to create the private note.
-
iOS ![]()
- Tap the + button from anywhere in the app and select Record Note.
- Select the company you want to record the note for from the list of your assigned companies.
-
To search for a specific company, tap the magnifying glass icon in the top right and enter the company’s name.
-
-
Select any reps you want to grant access to this private note from the list of reps within your organization.
-
Record your private note
- You can Pause or Resume your recording at any time by tapping the record button
- Review your private note and make any changes to the text. Tap Save when you're done.
Android ![]()
- Tap the + button from anywhere in the app and select Record Note.
- Select the company you want to record the note for from the list of your assigned companies.
-
To search for a specific company, tap the magnifying glass icon in the top right and enter the company’s name.
-
- Select any reps you want to grant access to this private note from the list of reps within your organization.
- Record your private note
- You can Pause or Resume your recording at any time by tapping the record button
- Review your private note and make any changes to the text. Tap Save when you're done.